Things you should know for a good selection of material

Posted on : Apr14, 2022 By GREFEE
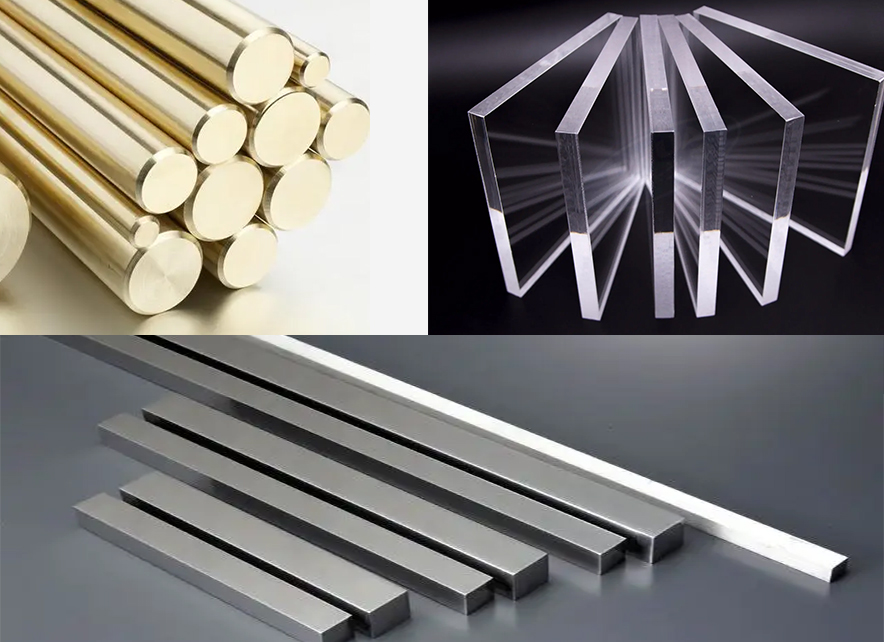
GREFEE has a strict material selection standard. Most materials that we use are from well-known material suppliers, and they come with material reports. Below is some knowledge of the material that you want to know. Begin with a new project with GREFEE.CONTACT
The metal material is often divided into three types, which are black metal, nonferrous metals, and special metals.
- Black metal, also known as steel material, including the pure industrial iron(iron content>90%), casting steel(iron content 2%-4%), carbon steel(iron content < 2%), as well as the structural steel, stainless steel, heat-resistant steel, superalloy, stainless steel, precision alloy, etc. Besides, chromium, manganese, and alloys are also black metals.
- Nonferrous Metals refer to all the metals and alloys except for iron, chromium, and manganese. Usually, it is divided into light metals, heavy metals, expensive metals, semi-metals, rare metals, rare earth metals, etc. the strength and stiffness of the nonferrous alloys are higher than that of pure metals. Besides, nonferrous alloys have electric resistance but a low resistance temperature coefficient.
- special metals materials include structural metal and functional metal materials. Among these, the amorphous metallic materials are from the rapid condensation process, quasicrystal, microcrystalline, nanocrystalline metal materials, etc. Besides, there are also special functional alloys with stealth, hydrogen resistance, superconductivity, shape memory, wear resistance, and vibration damping. Metal compound materials are also part of it.
Performance
- The performance is often divided into two types, process performance, and service performance. Process performance refers to the property of metal material presented in certain cold and heat treatment conditions in the mechanical components manufacturing processes.
- The property of metal materials decides their adaptability in the forming process. Due to different machining conditions, required machining properties are also different. Such as cast-ability, weldability, malleability, heat treatment performance, machinability, etc. The cast-ability of aluminum alloys is an essential factor for aluminum alloy makers.
- Service performance refers to the properties that metal materials present, including mechanical properties, physical properties, chemical properties, etc. service performance decides its service range and the service life. In the mechanical manufacturing industry, mechanical components work under normal temperature and pressure plus in intense corrosive mediums. Besides, different mechanical parts bear loads in the process. The property generated by the metal materials against the damages under loading is called the physical property (also called mechanical property).
- The mechanical property of metal materials is the primary evidence of the components’ design and material selection. Due to the natural difference in the applied loading (tension, compression, torsion, impact, cyclic load, etc), the mechanical properties of metal materials are different, too. Common mechanical properties include strength, plasticity, stiffness, impact rigidity, anti-impact, fatigue limit, etc.
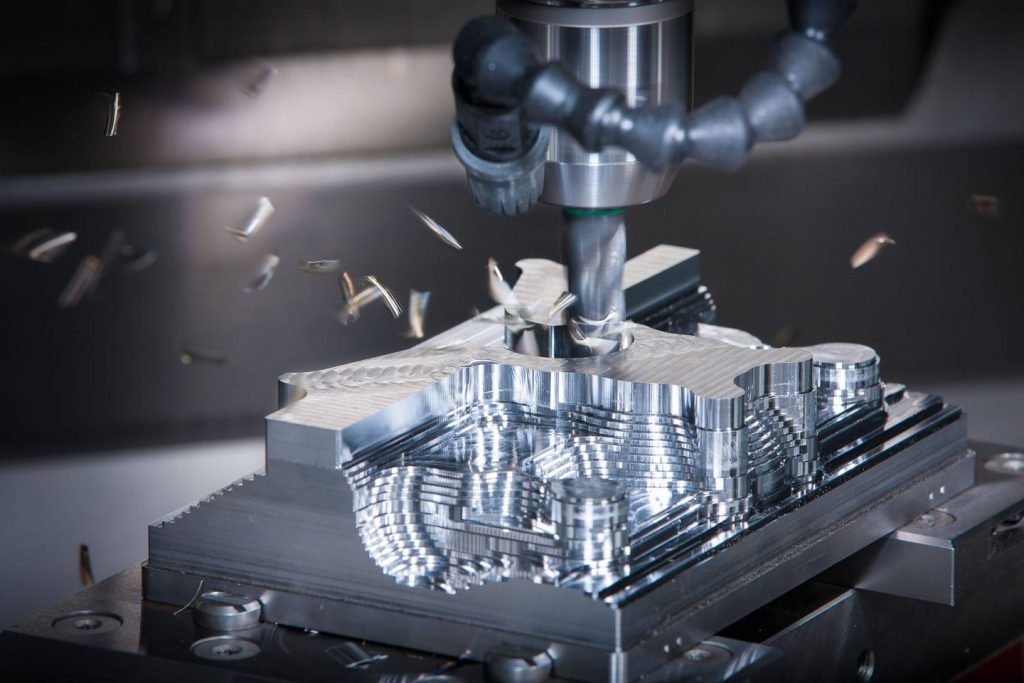
Metal materials properties
- Fatigue:Many mechanical components and engineering components work to bear the alternating load. Under the alternating load, although the stress level is lower than the limit of materials, it could lead to sudden cracking due to the long-term stress. This phenomenon is called the fatigue of metal materials. Characteristics of material fatigue cracking:
- Loading stress is alternate
- Working time of loading stress is long
- Cracking takes place instantaneously
- No matter whether it is plastic materials or brittle materials, the fatigue cracking place is brittle anyway. Thus, fatigue cracking is the most common, dangerous cracking mode.
The fatigue problem of metal materials can be divided into several types according to the conditions:
- High-cycle fatigue: the low-stress working conditions (the working stress is lower than the material’s yield limit, or elastic limit)and the fatigue with stress circle numbers, which are over one hundred thousand. It is common fatigue damage, which is also called simply fatigue.
- Low-cycle fatigue; fatigue in the high stress (working stress is close to the yield limit of materials) or high strained conditions, the stress cycle numbers are lower than 1000-100000. The plasticity of alternation plays an essential role in this fatigue damage. Thus, it is also called plasticity fatigue or strained fatigue.
- Heat fatigue: refers to the fatigue damages caused by the repeated actions of heat stress generated due to the temperature alteration.
- Corrosion fatigue: refers to the fatigue damages generated by the components under the alternate loading and corrosive mediums (acid, alkali, seawater, active gas, etc).
- Contact fatigue: when the surface of the machine components presents phenomenons of pitting peeled or surface crushing and peeling, causing the parts invalid and broken.
2. Plasticity
- Plasticity is an ability that protects the metal materials from being damaged when it has permanent deformation (plastic deformation)due to the applied loading. When the metal materials stretch, the length, and the cross-section area will change, too. Thus, the plasticity of metals can be measured by two standards: elongation of length (elongation) and reduction of section (reduction of section).
- The higher the elongation and reduction of area performance of the material, the higher the plasticity, which means the material will not be broken due to deformation. Metal material whose elongate percentage is lower than 5% is called brittle material (grey cast iron). Plasticity deformation is likely to occur in materials with good plasticity, and occurs in a wide range and strengthens the plasticity of metal materials at the same time. The strength increased so that the components are safer to use. Besides, materials with good plasticity can process forming technology, such as punching, cold bending, cold-drawing, straightening, etc. Thus, materials must meet the plasticity standards of making mechanical components.
3. Durability:Main forms of construction metal corrosion
- Uniform corrosion. The fracture surface turns thin and uniform due to the metal surface corrosion. Thus, the annual thickness impairment values are often regarded as the mark of corrosion property (corrosion percentage). Steel material often erodes evenly in the air.
- Holes corrosion. The metal erodes as spots and turns into deep holes. It is related to the nature of the metal and the medium the metal has. Holes corrosion is likely to occur in the medium which has chloride salt. The highest hole depth is the evolution standard. Pipe corrosion is primarily due to the holes-corrosion.
- Electric couple corrosion. A type of corrosion occurs due to the contact between different metals with different electric potentials.
- Crevice corrosion. A type of corrosion occurs on the crevice or hidden places on the surface due to the composition and density difference of the medium in different places.
- Stress corrosion. Under the corrosive mediums and high tensile stress conditions, the eroded metal surface would crack due to the micro crazing. This type of corrosion is likely to happen in the high-strength steel bars (steel wires).
4. Stiffness
- Stiffness refers to the ability to against the pressure from hard items. It is one of the important indexes of material. The high the stiffness is, the greater the anti-wear performance is. The commonly used hardness indexes are Brinell hardness, Rockwell hardness, and Vickers hardness.
- Brinell hardness (HB): press the hardened steel ball (diameter is 10mm) into the material surface with a certain load (generally 3000kg). The ratio of the loading and indentation area is the Brinell hardness value (HB) after unloading. The unit is kilogram-force / mm2 (n / mm2).
- Rockwell hardness (HR): when HB>450 or the sample is too small, Brinell hardness should be replaced with Rockwell hardness. The Rockwell hardness uses a steel ball of which diameter is 1.59, 3.18mm, or a diamond cone of which apex angle is 120 degrees. The steel ball is pressed into the material surface under a big load, then the stiffness of the materials gets from the depth of the indentation. Uses different head and total test pressure to make several different Rockwell hardness scales according to the stiffness of materials. Every scale is labeled with a letter after “HR” and the commonly used Rockwell hardness scale has three types(HRA、HRB、HRC). HRC is used most often.
HRA: stiffness obtained from the 60kg loading diamond-cone compress device, for material with extremely high stiffness (such as hardened alloys, etc).
HRB: using a hardened steel ball of which diameter is 1.58mm and 100kg load, the stiffness got is for materials with a low stiffness ( such as annealing steel, casting iron, etc).
HRC: stiffness got by using 150kg load and diamond cone pressing device, for materials with a high stiffness (such as quenching steel, etc).
Vickers hardness (HV): press the diamond square-cone compress device into the material surface with a 120 kg load. Using the indentation area to divide a load value is the Vickers hardness value (HV). The stiffness test is a simple and easy method in mechanical property tests. To replace some mechanical properties tests with stiffness tests, we need an accurate conversion formula of stiffness and strength. Based on practice, among all the stiffness values of metal materials, the stiffness value and strength value should have a corresponding relationship because the stiffness value depends on the initial plastic deformation resistance and continuous plastic deformation resistance. The high the strength, the higher the deformation resistance, and the higher the stiffness is.
Properties of metal materials
Properties of metal materials indicate the application range and reasonability of the materials. It is mainly divided into four parts: mechanical property, chemical property, physic property, and process performance.
(1). Mechanical property
- The concept of stress is the force that the internal unit area bears. The stress caused by the external force is called the working stress. The stress balanced in the interior of items without external force is called the internal stress (such as transformation stress, heat stress, and the residual stress after the machining process).
- Physical property is an ability by which the metals can bear the load, against the deformation and cracking (mechanical property). There are several types of load-bearing metal materials, which can be static load, and dynamic load, including separate or together tension stress, compressive stress, bending stress, shearing stress, torsional stress, friction, vibration, punching, etc. Thus, the index used to evaluate the mechanical property includes:
- Strength:It is the ability that the characterization material can bear against the deformation and damages, which is divided into tensile strength limit(σ b) bending strength limit(σBB) compressive strength limit( σ bc), etc. Because there are certain rules to follow from deformation to failure of metal materials under external force, the tensile test is usually used for measurement and making the material into the specified samples. Process the tension test on the tension test machine till the samples crack. The strength indexes of the test include:
- Strength limit: the largest stress of material that against the cracks. Generally, it refers to the ultimate tensile strength, represented by σb. For example, the corresponded strength limit of the highest point b in the tensile test diagram. The unit is MPa, conversion formula: 1MPa=1N/m2=(9.8)-1kgf/mm2 or 1kgf/mm2=9.8MPa。
- Yield strength limit: the external force that the material samples bear exceeds the elasticity limit, causing obvious deformation even though the stress does not increase anymore, which is yielding. That is to say, as the external force reaches a degree, the deformation is not directly proportional to the external force, then causing the deformation. The yielding stress is called the yield strength limit, represented by σs. The “S” point in the tensile test diagram is the yield point. For materials with high plasticity, there is a clear yielding point in the stretch curve. However, there is no yield point for materials with low plasticity. Thus, the yield limit can not get from the external force of the yield point. So, in the tensile test, the stress that leads to the gauge length of samples having 0.2% plasticity deformation is the offset yield strength, represented by σ0.2. The yield limit index can be the evidence for designing the parts which required no obvious plasticity deformation. For some critical components, the yield ratio (σs/σb) should be small as it increases the safety and reliability. However, the utilization rate decreased, too.
- Elastic limit: the property when materials deform due to the external force and recover without external force is called elasticity. The highest stress of elasticity deformation that the metal materials can remain is called the elastic limit, which is the “e” point of the tensile test diagram, represented by σe, unit: MPa: the Pe in the σe=Pe/Fo is the highest force for keeping the elasticity (or the load of the worst elasticity deformation)
- Elasticity mold numbers: the ratio of the stress σ and strainδ within the elasticity limit range (unit deformation corresponding to stress), represented by E, unit MPa: a in E=σ/δ=tgα is the included angle of the o-e line and horizontal axis o-x. The elasticity mold numbers are the index that reflects the rigidity of metal materials (the ability that resists the deformation when the metal material is under stress is called the rigidity).
(2).Plasticity
The ability that the materials not be broken but only permanent deformation under the external force is called plasticity. Usually, it is the gauge length elongation δ (%)and the reduction of fracture surface area ψ (%), elongation percentage δ=[(L1-L0)/L0]x100%, which is the ratio of the difference (increase) between the gauge length L1 and the original gauge length l0 of the sample after the fracture of the sample broken in the tensile test. In experiments, if only with the same material but different specifications (diameter, section area – for example, square, circular, rectangle, and gauge length), one will get different elongation percentages. Thus, the value should be specified, such as the elongation percentage δ5 of the common circular section sample whose original gauge length is five times that of the diameter of the samples, while the elongation percentage δ10 is when the original gauge length is ten times that of the diameter of the samples. Reduction of area ψ= [(F0-F1)/F0]x100%, which is the ratio of the difference (section reduction) between the minimum cross-sectional area F1 at the fine neck of the fracture place, and the original cross-section area F0 of the sample after the fracture of the sample broken in the tensile test.The circular section can got from the diameter measurement: ψ=[1-(D1/D0)2]x100%. In the formula, D0 – original diameter of samples, D1 – minimum diameter of the fracture neck place after the sample is broken. The big the δ and ψ, the great the plasticity.
(3) .Toughness
- The ability against the damages under the impact load is called the toughness. Usually, an impact test is often used, in which a metal sample in a specified dimension and shape bears the impact load on an impact machine of a specified type. The consumed
- The impact per unit section area of the fracture is the toughness of the materials.
- αk=Ak/F unit J/cm2 or Kg·m/cm2,1Kg·m/cm2=9.8J/cm2αk is called the impact toughness of metal materials. Ak is the impact energy, and F is the original cross-sectional area of the fracture.
5. Under a long-term, repeated stress, or alternate stress(stress is lower than the yield fatigue strength σs), the phenomenon that metal materials crack without evident deformation is called fatigue damages or fatigue cracks. It is due to several reasons which make the stress on the parts’ surface higher than the σs or even the σb (stress concentrated). Due to the concentrated stress, plasticity deformation or micro-cracking occurs at local places. As the times of alternate stress increase, the micro-cracks expand and deepen gradually (concentrated stress on the tip of the cracks), causing the actual section area which bears the stress decreases till the sample is broken due to the local stress > σb. In the real cases, under the repeated or alternate stress (tensile stress, compressive stress, bending or torsional stress etc) and within the specified number of cycles (generally 106 ~ 107 times for steel and 108 times for non-ferrous metals), the maximum stress that a sample bears but does not crack are called the fatigue strength limit, represented by σ-1, unit MPa.
(1)Besides the above five common mechanical property indexes, some materials used in the aerospace and nuclear and power factories have strict requirements for mechanical properties, which is creep limit: with a specific temperature and constant tensile load, the phenomenon that materials gradually have plasticity deformation is creeping. Generally, the high-temperature tensile creep test is often used. The high-temperature tension fatigue limit: under a constant temperature and elongation load, the maximum stress that the sample bears in a required constant period without cracking; Heat resistance: the material resistance to mechanical load under a high temperature.
(2)Chemical property:The property is from the chemical reaction of metals and other items, Corrosion resistance, oxidation resistance ( also called oxidize resistance, which refers to the resistance or stability of metals to oxidation under a high temperature), or the chemical compound between different metals or between metals and nonmetals, etc. In the chemical properties of metals, the corrosion resistance is of great significance for the corrosion fatigue damages of metals.
(3) Physical properties:Considerations of the physical properties of metals:
- Density (specific gravity): ρ= P / V unit: gram / cubic centimeter or ton / cubic meter, P refers weight, V refers volume. In real cases, besides calculating the weight of metal parts with the density, another one that matters significantly is the strength ratio ( ratio of strength σ B and density ρ) of metal. The strength ratio helps with an array of things, like selecting materials and the acoustic impedance (Product of the density ρ and sound velocity C) in the acoustic detection related to the nondestructive testing, and substances with different densities have different absorption capacity of ray energy in X-ray testing and so on.
- Melting point: the temperature that turns metal from solid state into liquid state affects the forging and heat treatment of metal materials directly. It is also related to the high temperate property of materials.
- Thermal expansibility. As the temperature changes, the volume of materials also changes (expansion or contraction). This phenomenon is called thermal expansibility. The multi-purpose linear expansion-coefficient measurement is used. When the temperature change is 1 degree, the ratio of the increase and decrease amount of the material’s length and the length of the materials at 0 degrees. Specific volume (material affected by temperature, the increase and decrease of the material volume of unit gravity is the ratio of volume and quality), especially when the metal parts work under high temperatures or in cold and hot alternation environments. The expansion property is very important.
- Magnetism. The ability that attracts ferromagnetic objects is called magnetism. It reflects by the coefficient of permeability, hysteresis loss, residual magnetic induction, coercive force, etc. The metal materials are divided into paramagnetic and diamagnetic, soft and hard magnetic materials.
- Electrical property. The electroconductibility is important in the ndt, which affects the resistance rate, eddy current loss, etc.
(4). Processing property:The adaptability metals present to different processing technologies is called the processing property. Mainly including four parts, which are:
- Machining property: it mainly reflects on the difficulties of the machining tools (turning, milling, planing and grinding, etc) to do the machining on the metal materials.
- Forgeability: the difficult degree to which the metal materials-forming under pressure. Like the level of the plasticity if warm up the material to a certain level (the level of the plasticity deformation resistance), the temperature range which allows the heat stress machining, thermal expansion, and cold contraction characteristics, microstructures, mechanical property-related deformation limit, the fluidity of metal during thermal deformation, heat conductivity, etc.
- Cast ability: indicate the difficult degree of melting and casting the metal material into the casting parts. It is presented by the fluidity, inspiratory, oxidizing, melting point, uniformity, compatibility, and cold contraction percentage of the microstructure of casting parts.
- Weldability: the difficult degree reflected on the local place of metal materials being heated rapidly, which makes the bonding place melted or semi-melted instantly (need pressure) and reinforces the bonding places. It shows the melting point, gettering, oxidation, thermal conductivity, thermal expansion, cold contraction characteristics, plasticity, correlation with the microstructure of the joint and nearby materials, and its influence on the mechanical properties.
MORE BOLG
Insert mold in injection mold service
What are advantages and disadvantages of Zinc alloy and Aluminum alloy?
Inspection standards for injection molded partappearance
How to judge the quality of your plastic products?
Inspection standards for CNC machining
To ensure that your products are 100% qualified
Categories

Try GREFEE now,for free
We keep your uploaded files confidential and secure.
